
Showing posts with label Camilla Drakenborg. Show all posts
Showing posts with label Camilla Drakenborg. Show all posts
Simple Pleasures

Program of choice is pspX2
This tutorial was written for those that have a working knowledge of PSP.
-----------------------------------------
Supplies Needed
Tube/Image of choice – Camilla Drakenborg - UpYourArt
You will need a license to use this tube
Template - Vix - Template 09 - VIX
Included with Papers and elementsin tut supplies you can find Here
Mask - WSLMASK_220 - WeeScottsLass
Font used – Poplar STD & Pixelette (Credits)
-----------------------------------------
-Lets Get Started-
Open the Template - close of credits
CTRL+D Close out original Template.
Paste a paper of choice from supplies or
floodfill with a colour from your tube.
I chose a paper.
Layers - Load/Save Mask - Load Mask from disk -
Load your mask of choice - or use as i have
Mask - load with the following settings
Source Luminance - Fit to canvas - Hide all mask checked.
Merge Group. Move to the bottom.
Select a section of the template.
Selections - Select all - Float - Defloat
Copy and paste a paper of choice from Supplies provided.
or another kit, or color of choice.
I will assume you are using the supplies enclosed.
Selections - Invert - Hit delete on your keyboard.
Repeat this step for the remaining sections of the template
that you are wanting to fill.
You can also use the above steps just color if you prefer
not to use scrap kits.
Add a drop shadow to each layer
that you colour/Paste paper to.
I used Drop shadow with the following settings.
remembering to add drop shadow to each layer.
Effects - 3D Effects - Drop shadow
CTRL+D Close out original Template.
Paste a paper of choice from supplies or
floodfill with a colour from your tube.
I chose a paper.
Layers - Load/Save Mask - Load Mask from disk -
Load your mask of choice - or use as i have
Mask - load with the following settings
Source Luminance - Fit to canvas - Hide all mask checked.
Merge Group. Move to the bottom.
Select a section of the template.
Selections - Select all - Float - Defloat
Copy and paste a paper of choice from Supplies provided.
or another kit, or color of choice.
I will assume you are using the supplies enclosed.
Selections - Invert - Hit delete on your keyboard.
Repeat this step for the remaining sections of the template
that you are wanting to fill.
You can also use the above steps just color if you prefer
not to use scrap kits.
Add a drop shadow to each layer
that you colour/Paste paper to.
I used Drop shadow with the following settings.
Effects - 3D Effects - Drop shadow
load the following settings
0 - 0 - 30 - 6.00 - Black.
Copy and paste your tube as a new layer
place as you wish or as i have,
See my finished Tag as a guide.
also add any other embelishments that you may desire.0 - 0 - 30 - 6.00 - Black.
Copy and paste your tube as a new layer
place as you wish or as i have,
See my finished Tag as a guide.
remembering to add drop shadow to each layer.
Effects - 3D Effects - Drop shadow
load the following settings
0 - 0 - 30 - 6.00 - Black.
0 - 0 - 30 - 6.00 - Black.
Add any elements that you may wish
i added the lips from my supplies and resized to suit
also added a drop shadow to this layer.
I have enclosed a few elements for you to use if you wish.
i added the lips from my supplies and resized to suit
also added a drop shadow to this layer.
I have enclosed a few elements for you to use if you wish.
Add any other names and copy rite information that is required,
Save as you would normally.
Thats it tutorial complete. Use my finished result as a reference.
This tutorial was written by DigiMania Scraps
Any resemblance to any other tutorial is purely coincidental
All tutorials are registered at Tutorial Writers Inc.
PUMPKIN PATCH
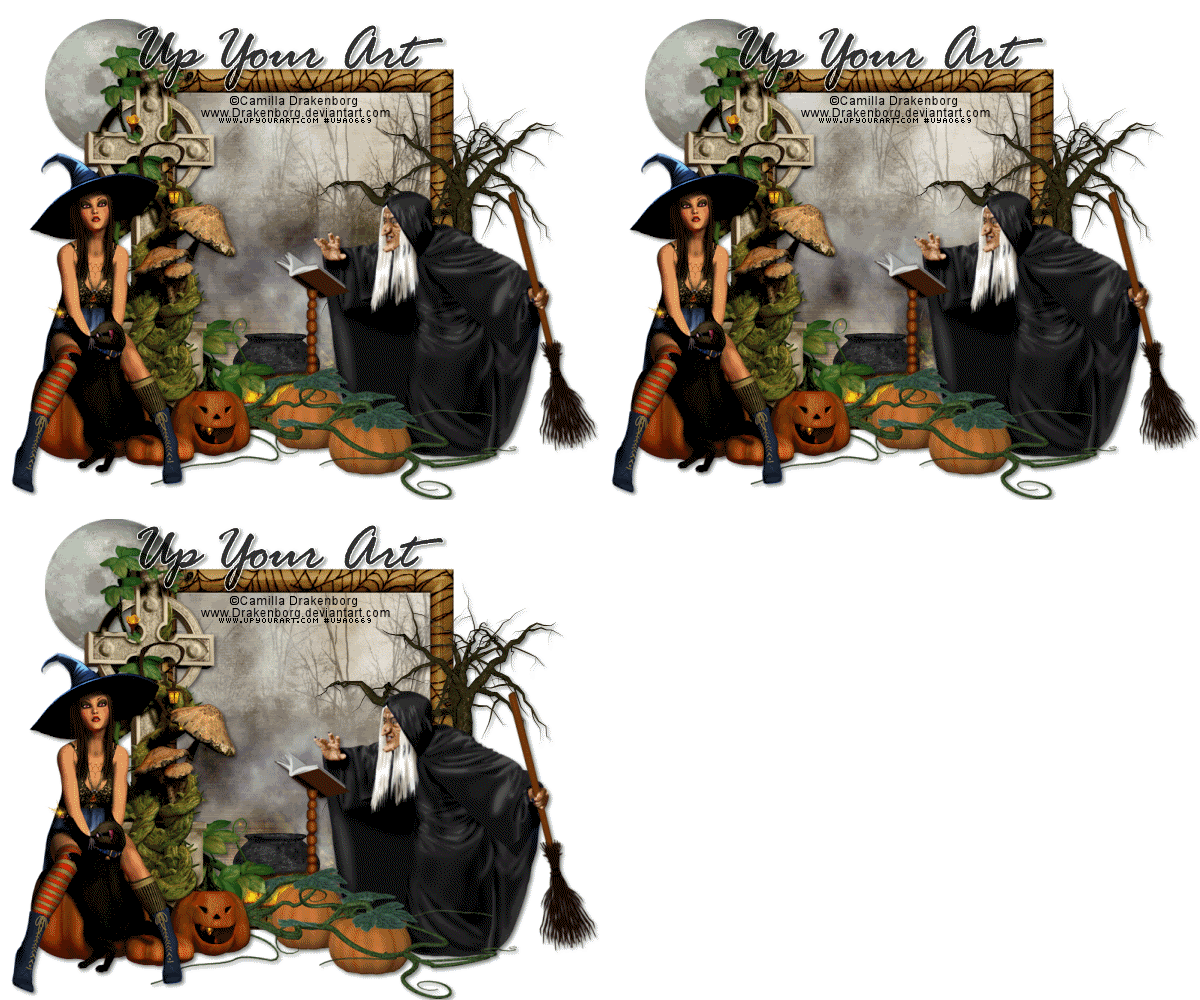 Program of choice is pspX2
This tutorial was written for those
that have a working knowledge of PSP.
-----------------------------------------
Supplies Needed
Tube/Image of choice – Camilla Drakenborg - Upyourart
You will need a license to use this tube
Scrapkit - The Perfect Scare - Horseplay's Pasture Designs
Filter used - Mura's Meister - Clouds
Optional Filter - Xero Porcelain
Animation Shop
Font used – Rage Italic & Pixelette (Credits)
-----------------------------------------
-Lets Get Started-
Open a new canvas
600x500
Select a frame of choice from the scrapkit
I will assume that you are using the same FTU kit as i currenlty am.
With your magic wand select the inner of the frame.
Selections Select all - float - defloat -
Modify - Contract by 6.
Hit the delete key on your keyboard.
Using your magic wand Select the inner of your rectangle.
Copy and paste a paper of choice to your inner of the rectangle
I used my paper 6. Gives a haunted scene,
Copy and paste your tube as a new layer.
Add the OPTIONAL FILTER Xero Porcelain.
You dont have to add this effect.
Mess with the settings untill you are happy.
or load with the following settings.
50 - 128 - 128 - 0 - 0 - 255.
Add any other embelishments of your choice,
Either use the same as i have or any will work
with the same effect, Remember to add a dropshadow to each layer.
i use 2 - 2 - 50 - 5 - Black. Load.
ANIMATION
Back to your paper layer duplicate this layer by 3.
close off both duplicates.
On the original layer,
Selections Select all, Float, Defloat, Effects, Plugins
Muras Meister, Cloud.
Load with the following settings
39 - 100 - 3 - 0 - 0 - 0 - 0 - 0 - 0.
Paper Layer 2.
Repeat the above steps when coming to load the cloud filter change the first
effect to 48. Hit OK.
Paper layer 3.
Again repeat the above steps,
Changing the cloud filter to 56. Hit ok.
CLOSE OF LAYER 2 AND 3.
Add any other names and copyrite information that is required,
Save as you would normally.
ANIMATION SHOP
Open Animation Shop.
Back over to psp. Right click copy Merged.
over to animation shop right click paste.
Back to PSP. Close of paper 1.
unclose paper 2. Right click copy merged.
back over to animation shop.
Paste after current frame.
Back over to psp for the final time.
close of paper 2 and unclose paper 3.
Right click copy merged.
Back to animation shop paste after current frame.
Click the first frame of your animation
Edit - Select all - Animation - Frame Properties - Change the
time display to 55. Run animation. If happy
Save as you would normally save.
Thats it tutorial complete.
Use my finished result as a reference.
This tutorial was written by DigiMania Scraps
Any resemblance to any other tutorial is purely coincidental
All tutorials are registered at Tutorial Writers Inc.
Program of choice is pspX2
This tutorial was written for those
that have a working knowledge of PSP.
-----------------------------------------
Supplies Needed
Tube/Image of choice – Camilla Drakenborg - Upyourart
You will need a license to use this tube
Scrapkit - The Perfect Scare - Horseplay's Pasture Designs
Filter used - Mura's Meister - Clouds
Optional Filter - Xero Porcelain
Animation Shop
Font used – Rage Italic & Pixelette (Credits)
-----------------------------------------
-Lets Get Started-
Open a new canvas
600x500
Select a frame of choice from the scrapkit
I will assume that you are using the same FTU kit as i currenlty am.
With your magic wand select the inner of the frame.
Selections Select all - float - defloat -
Modify - Contract by 6.
Hit the delete key on your keyboard.
Using your magic wand Select the inner of your rectangle.
Copy and paste a paper of choice to your inner of the rectangle
I used my paper 6. Gives a haunted scene,
Copy and paste your tube as a new layer.
Add the OPTIONAL FILTER Xero Porcelain.
You dont have to add this effect.
Mess with the settings untill you are happy.
or load with the following settings.
50 - 128 - 128 - 0 - 0 - 255.
Add any other embelishments of your choice,
Either use the same as i have or any will work
with the same effect, Remember to add a dropshadow to each layer.
i use 2 - 2 - 50 - 5 - Black. Load.
ANIMATION
Back to your paper layer duplicate this layer by 3.
close off both duplicates.
On the original layer,
Selections Select all, Float, Defloat, Effects, Plugins
Muras Meister, Cloud.
Load with the following settings
39 - 100 - 3 - 0 - 0 - 0 - 0 - 0 - 0.
Paper Layer 2.
Repeat the above steps when coming to load the cloud filter change the first
effect to 48. Hit OK.
Paper layer 3.
Again repeat the above steps,
Changing the cloud filter to 56. Hit ok.
CLOSE OF LAYER 2 AND 3.
Add any other names and copyrite information that is required,
Save as you would normally.
ANIMATION SHOP
Open Animation Shop.
Back over to psp. Right click copy Merged.
over to animation shop right click paste.
Back to PSP. Close of paper 1.
unclose paper 2. Right click copy merged.
back over to animation shop.
Paste after current frame.
Back over to psp for the final time.
close of paper 2 and unclose paper 3.
Right click copy merged.
Back to animation shop paste after current frame.
Click the first frame of your animation
Edit - Select all - Animation - Frame Properties - Change the
time display to 55. Run animation. If happy
Save as you would normally save.
Thats it tutorial complete.
Use my finished result as a reference.
This tutorial was written by DigiMania Scraps
Any resemblance to any other tutorial is purely coincidental
All tutorials are registered at Tutorial Writers Inc.
Evil Angel
 Program of choice is pspX2
This tutorial was written for those
that have a working knowledge of PSP.
-----------------------------------------
Supplies Needed
Tube/Image of choice – Camilla Drakenborg - Upyourart
You will need a license to use this tube
Template - Kristin Template 159 - Toxic Desirez
Scrapkit - The Perfect Scare (FTU) - Horseplay Pastures
Optional Filter - Xero Porcelain
Font used – Blood Omen & Pixelette (Credits)
-----------------------------------------
-Lets Get Started-
Open a template of choice i used Kristins Template 159
Close off the Credits,
On your Template fill each section with your papers of choice.
I used several different papers for this,
Add drop shaddow 2 2 on each section,
Select the large Circle layer,
Selections, Select all float defloat,
Again Paste a paper of choice,
Repeat this step for the remaining layers
And Frame layers.
Copy and paste your tube as a new layer and place as you wish
or as i have, See finished guide as a referance.
OPTIONAL FILTER
I also applied the Xero-porcelain filter
50 - 128 - 128 - 0 - 0 - 255 - ok.
Add your elements of choice.
Add drop shaddow 2 2
To all of these layers,
I used several Different elements from this wonderful kit
so many different elelemnts to play with
You can use the same as i did.
You can also place in the same places i have,
Remember to add the same previously used
dropshadow to each of the layers,
Add any other names and copyrite information that is required,
Save as you would normally.
Thats it tutorial complete.
Use my finished result as a reference.
This tutorial was written by DigiMania Scraps
Any resemblance to any other tutorial is purely coincidental
All tutorials are registered at Tutorial Writers Inc.
Program of choice is pspX2
This tutorial was written for those
that have a working knowledge of PSP.
-----------------------------------------
Supplies Needed
Tube/Image of choice – Camilla Drakenborg - Upyourart
You will need a license to use this tube
Template - Kristin Template 159 - Toxic Desirez
Scrapkit - The Perfect Scare (FTU) - Horseplay Pastures
Optional Filter - Xero Porcelain
Font used – Blood Omen & Pixelette (Credits)
-----------------------------------------
-Lets Get Started-
Open a template of choice i used Kristins Template 159
Close off the Credits,
On your Template fill each section with your papers of choice.
I used several different papers for this,
Add drop shaddow 2 2 on each section,
Select the large Circle layer,
Selections, Select all float defloat,
Again Paste a paper of choice,
Repeat this step for the remaining layers
And Frame layers.
Copy and paste your tube as a new layer and place as you wish
or as i have, See finished guide as a referance.
OPTIONAL FILTER
I also applied the Xero-porcelain filter
50 - 128 - 128 - 0 - 0 - 255 - ok.
Add your elements of choice.
Add drop shaddow 2 2
To all of these layers,
I used several Different elements from this wonderful kit
so many different elelemnts to play with
You can use the same as i did.
You can also place in the same places i have,
Remember to add the same previously used
dropshadow to each of the layers,
Add any other names and copyrite information that is required,
Save as you would normally.
Thats it tutorial complete.
Use my finished result as a reference.
This tutorial was written by DigiMania Scraps
Any resemblance to any other tutorial is purely coincidental
All tutorials are registered at Tutorial Writers Inc.
Gothic Chic
 Program of choice is psp13
This tutorial was written for those
that have a working knowledge of PSP.
-----------------------------------------
Supplies Needed
Tube/Image of choice – (C)Cammila Drakenborg - UpYourArt
You will need a license to use this tube
Scrap kit of choice – PTU - Gothic Desire
Available to purchase at – Sinful Creations
Template of Choice – Kristin – Skull Template 3
Filter - Xero Porcelain - OPTIONAL
Font used – SF Gothican Bold
-----------------------------------------
-Lets Get Started-
Open a template of choice i used Skull 3
Close off the Credits,
On your Template fill each section with your papers of choice.
I used several different papers for this,
Add drop shaddow 2 2 on each section,
Select the Rectangle layer,
Selections, Select all float defloat,
Again Paste a paper of choice,
Repeat this step for the remaining layers
And Frame layers.
Copy and plaste your tube as a new layer and place as you wish
or as i have, See finished guide as a referance.
OPTIONAL FILTER
I also applied the Xero-porcelain filter
50 - 128 - 128 - 0 - 0 - 255 - ok.
Add your elements of choice.
Add drop shaddow 2 2
To all of these layers,
I used several Different elements from this wonderful kit
so many different elelemnts to play with
You can use the same as i did.
You can also place in the same places i have,
Remember to add the same previously used
dropshadow to each of the layers,
Add any other names and copyrite information that is required,
Save as you would normally.
Thats it tutorial complete.
Use my finished result as a reference.
This tutorial was written by DigiMania Scraps
Any resemblance to any other tutorial is purely coincidental
All tutorials are registered at Tutorial Writers Inc.
Program of choice is psp13
This tutorial was written for those
that have a working knowledge of PSP.
-----------------------------------------
Supplies Needed
Tube/Image of choice – (C)Cammila Drakenborg - UpYourArt
You will need a license to use this tube
Scrap kit of choice – PTU - Gothic Desire
Available to purchase at – Sinful Creations
Template of Choice – Kristin – Skull Template 3
Filter - Xero Porcelain - OPTIONAL
Font used – SF Gothican Bold
-----------------------------------------
-Lets Get Started-
Open a template of choice i used Skull 3
Close off the Credits,
On your Template fill each section with your papers of choice.
I used several different papers for this,
Add drop shaddow 2 2 on each section,
Select the Rectangle layer,
Selections, Select all float defloat,
Again Paste a paper of choice,
Repeat this step for the remaining layers
And Frame layers.
Copy and plaste your tube as a new layer and place as you wish
or as i have, See finished guide as a referance.
OPTIONAL FILTER
I also applied the Xero-porcelain filter
50 - 128 - 128 - 0 - 0 - 255 - ok.
Add your elements of choice.
Add drop shaddow 2 2
To all of these layers,
I used several Different elements from this wonderful kit
so many different elelemnts to play with
You can use the same as i did.
You can also place in the same places i have,
Remember to add the same previously used
dropshadow to each of the layers,
Add any other names and copyrite information that is required,
Save as you would normally.
Thats it tutorial complete.
Use my finished result as a reference.
This tutorial was written by DigiMania Scraps
Any resemblance to any other tutorial is purely coincidental
All tutorials are registered at Tutorial Writers Inc.
Subscribe to:
Posts
(Atom)
Blinkie
